On the Page:
Instructions to Grant Access
You may grant your parents, guardians or other users online access to make a payment, view your account activity, and/or view your Financial Aid information. To protect your privacy, the Family Educational Rights and Privacy Act (FERPA) requires us to obtain student permission before sharing your educational records.
Please follow the steps below to grant access.
- Sign in to Hornet HQ.
- Enter your username and password then select the “Sign In” button
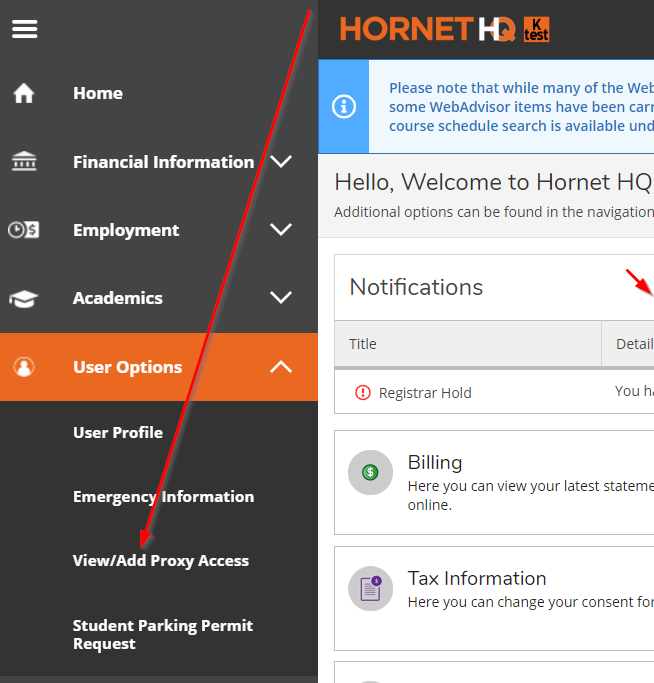
- Select the “User Options” menu item (indicated by icon) located on the left navigation menu.
- Select “View/Add Proxy Access”
- Under the “Add a Proxy” section, select the drop down under “Select a Proxy”
- Selecting your Proxy:
- If the person is listed in the drop down box:
- Select the person you wish to become an Authorized User
- Double check that the email address listed for that person is correct. If the email address listed for that person is incorrect, follow the directions below under adding and changing proxy contact information
- Select the access you wish to grant to your proxy.
- Read the Disclosure Agreement
- Check the box to indicate your authorization
- Click the save button
- If you do not see the person listed:
- Follow the directions below under adding and changing proxy contact information
- If the person is listed in the drop down box:
How to Reauthorize a Proxy
If you have withdrawn from K or graduated, proxies will need to be reauthorized to access the previously specified portions of your records. By following the steps below you can reauthorize all of your proxies. Please note that if you would like to change your list of proxies or their permissions, you can do so as outlined in steps 2 and 3 under the View/Add Proxies option. To change your proxy contact information see our note on Adding and Changing Proxy Contact Information.
- Select the Menu
- Select User Options
- Select the View/Add Proxies option to be taken to the View/Add Proxy Page

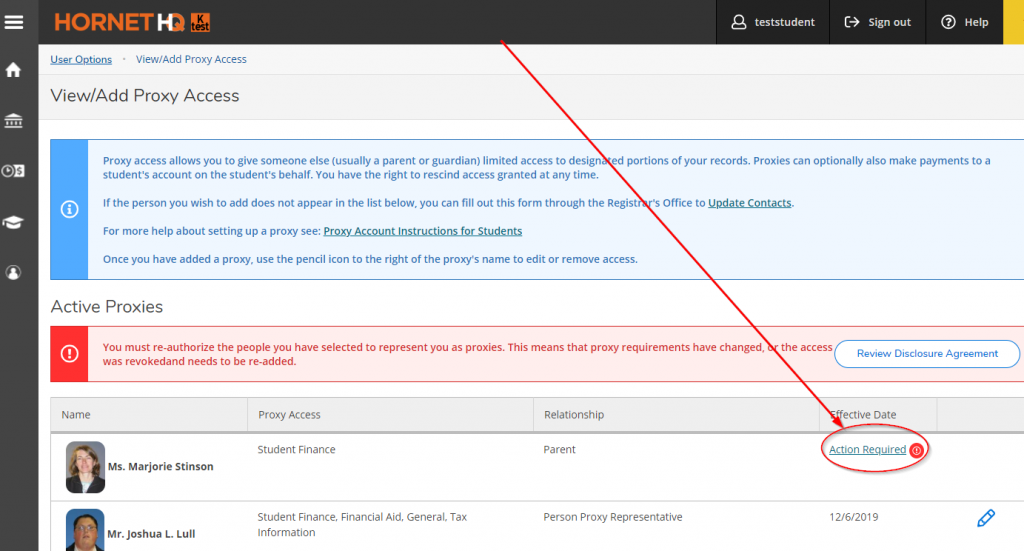
- Proxies that need to be reauthorized will have the text “Action Required” located in the Effective Date column under the Active Proxies section.

- To reauthorize your proxies select the Review Disclosure Agreement button located in the alert. This will officially reauthorize all proxies.
Adding and Changing Proxy Contact Information
To add or change your proxy or parent contact information you, the STUDENT must contact the Registrar’s Office by either completing the Create a Proxy Form, the Update Contact Information Form or via phone at 269.337.7204 or email at Regist@kzoo.edu.
